How to Clean a Fish Tank in Five Easy Steps
To make sure that your fish stay healthy, it’s crucial that you keep the conditions of your tank optimal.
This needs routine maintenance and cleaning in order to help maintaining the delicate ecosystem in your tank.
Water in your aquarium can easily become a harm to your fish if it is not maintained correctly.
By properly cleaning and maintaining your tank , you won’t ever be in need to remove all of the water immediately. Matter of fact, by doing this, you will erase all of the good bacteria that have built up.
If you are a complete beginner, you may think that it’s easier to clean a small bowl or tank; this is an false assumption. The larger your aquarium , the easier you can keep the water stable.
If you want to understand Why You Need to Clean Your Fish Tank, The Importance of Regular Cleaning, How Often Should You Clean Your Tank, Acceptable Aquarium Parameters, and How to Clean a Fish Tank in Five Easy Steps then continue reading the article.
Why You Need to Clean Your Fish Tank
There are three end goals you are trying to achieve when you clean your fish tank; they are known as the three Rs.
- Regulate the nitrogen cycle
- Remove dissolved and particulate organic compounds
- Replenish essential minerals
1. To keep the nitrates in low concentration
The nitrogen cycle is the process in which ammonia is turned to nitrite by bacteria and then to nitrate. Both ammonia and nitrite are a toxic treat to fish, and so having bacteria colonies in your fish tank is important to convert them harmful compounds to nitrate.
Nitrates are considered a less harm to fish and can be removed by regular water changes.
Before you introduce any fish to your tank, preferably it will have been cycled; there are a number of different ways to cycle your tank. One of the best methods is putting artificial ammonia in your tank to start building up the bacteria colony which breaks down ammonia and nitrites.
2. To erase dissolved and particulate organic compounds
Organic compounds are defined by chemists as those that are formed of both hydrogen and carbon; (they can also contain other atoms too). Examples include fatty acids, vitamins, sugars, amino acids and proteins.
Organic matter is divided to dissolved organic matter (DOM) and particulate organic matter (POM).
DOM is any organic material which can pass through 0.2 0 1.0 um filters, whilst POM will not pass through them.
Organic matter involves any waste which is made as a natural consequence of having a tank full of fish that are fed on a regular basis. Just like colonies of bacteria break the ammonia down is broken down by the colonies of bacteria, so is food waste and other organic matters in your tank.
Plants in freshwater tanks can make use of some of these organics, and the rest can be controlled by regular cleans and water changes .
3. To replenish minerals
When fish are kept in water with insufficient minerals, either too low or too high, this can cause in osmotic stress, which can, in turn, lead to osmotic shock, and ultimately death.
Often when fish keepers add water to their tank, they use RO water, which has been through the reverse osmosis process. This process removes the majority of tap water impurities, but it also removes the essential minerals which your fish need.
Therefore you should use a product to supply these essential minerals back into the aquarium.
Regular Maintenance
Make sure to check your tank regularly!
Before we begin to look at techniques to clean your fish tank, we are going to take a look at the regular weekly and daily maintenance tasks you should undertake to make sure that your tank stays in a healthy condition in between cleans.
Daily Tank Maintenance
These daily chores will only take a few minutes and will help you maintaining a healthy tank.
- Feed your fish twice a day and remove the uneaten food after five minutes (this will prevent the uneaten food from breaking down and affecting the water quality).
- Quickly check over all the fish in your tank (i.e. are they all behaving normally, no injuries, and disease free?).
- Check the water temperature and specific gravity (by monitoring these two parameters daily, you will be able to quickly rectify any adjustments).
Weekly Tank Maintenance
- Water checks –nitrate, pH, nitrite and ammonia levels, and salinity (in saltwater tanks). You can either test your water at your local fish store or just purchase a home testing kit. Home kits are extremely easy to use.
- Brief check over your equipment – the lights, filter etc. This only needs to be a quick check to make sure that everything is working properly, the rest can be done during the tank clean.
How Often Should You Clean Your Tank?
A Regular Cleaning Schedule is very important
The size of your tank determines the amount of water you need to replace, and the regularity of your water changes, and the amount of fish you have in there.
As a guideline, you should have an end goal of giving your freshwater tank a partial water change of 10-20% every 2 – 3 weeks.
For a saltwater tank, you should weekly change 10% of the water for the first year of having the aquarium, you can then follow a similar guideline to freshwater tanks.
If you maintain your tank correctly, you won’t need to change water fully, in fact, by doing this; you will be removing all the bacteria which are essential in breaking down the waste your fish create.
The more fish you have, the faster the water needs changing , the larger the bio-load and the; the same goes for smaller tanks as the water becomes unstable.
During the first few months of keeping fish, you should be monitoring the water conditions of the tank regularly.
You’ll start to understand on how often your tank should be cleaned when you keep a record of all the parameters.
The parameters depend on the species that you are keeping, but you can use the parameters below as a guideline.
Remember different species have more specific requirements therefore you should always research the corals, fish or invertebrates that you are keeping in your aquarium to check the acceptable parameters.
Freshwater Parameters
| Parameter | Freshwater | Brackish | Pond |
| Temperature | 72 – 82oF | 72 – 82oF | 33 – 76oF |
| pH | 6.5 – 7.5 | 7.5 – 8.4 | 6.5 – 7.5 |
| Alkalinity (Carbonate Hardness) | 4 – 8 KH | 10 – 18 KH | 4 – 8 KH |
| General Hardness | 4 – 12 GH | 12 – 20 GH | 4 – 12 GH |
| Ammonia | 0.0 | 0.0 | 0.0 |
| Nitrate | 0.0 | 0.0 | 0.0 |
| Nitrate | <50 ppm | <50 ppm | <50 ppm |
Saltwater Parameters
| Parameter | FOWLR Aquarium | Reef Aquarium | Coral Reef |
| Temperature | 72 – 82oF | 72 – 82oF | 82oF |
| pH | 8.1 – 8.4 | 8.1 – 8.4 | 8.0 – 8.5 |
| Alkalinity (Carbonate Hardness) | 8 – 12 dKH | 8 – 12 dKH | 6 – 8 dKH |
| Specific Gravity | 1.020 – 1.025 | 1.023 – 1.025 | 1.025 |
| Ammonia (NH3) | Undetectable | Undetectable | Near Zero |
| Nitrite (NO2) | Undetectable | Undetectable | Near Zero |
| Nitrate – Nitrogen (NO3) | <30 ppm | <1.0 ppm | 0.25 ppm |
| Phosphate (PO4) | <1.0 ppm | <0.2 ppm | 0.13ppm |
| Calcium | 350 – 450 ppm | 350 – 450 ppm | 380 – 420 ppm |
| Magnesium | 1150 – 1350 ppm | 1250 – 1350 ppm | 1300 ppm |
| Iodine | 0.04 – 0.10 ppm | 0.06 – 0.10 ppm | 0.06 ppm |
| Strontium | 4 – 10 ppm | 8 – 14 ppm | 8 – 10 ppm |
How to Clean your Tank in Five Easy Steps
- Preparation
- Water Removal
- Algae Removal
- Filter Cleaning
- Water Replacement
Step One – Preparation
Gather all the supplies you are in need of ; listed below.
Supplies You Will Need to Clean
- A siphon gravel vacuum
- Algae scraper/pad (we recommend a magnetic cleaner)
- Large bucket (make sure this is only used for cleaning your aquarium , therefore households chemicals don’t get into the tank)
- New filter media (optional)
- Used clean towel/cloth
- Prepared water (the type and amount depend on how much you need to replace and whether you have a freshwater tank or saltwater )
- Water testing kit
- Powerhead and heater (saltwater aquarium)
- A salinity probe (saltwater aquarium)
The majority of aquariums so heavy and hard to move, therefore you’ll be in need a siphon that allows you to take water out of the tank and a bucket that allows you to bring replacement.
Unplug all the electrical elements in the aquarium (filter, heater, and any pumps.)
Remove any large decorations or ornaments.
Top-Tip
Make sure you take your time with it and so you don’t stir up any debris at the bottom of the tank.
If you possess any artificial plants, you can remove them when cleaning, but never remove live plants – this will disturb the root growth.
Step Two – Water Removal
Siphoning Water From the Tank
You will need to replace approximately 10-20% of the water in your aquarium every 2-3 weeks.
Use a siphon gravel vacuum, with an attached hose to clean the gravel and get rid of the water.
You should suck up small amounts of gravel using the siphon, the waste will then be sucked through the tube into the bucket along with water, and the gravel will fall back into place.
Use your thumb to block the end of the tube so you can slow down the siphoning process, and ensure that none of the gravel makes it into the tube.
Some siphons possess a built-in regulator to control the flow of water, some also have longer hoses so the water can be taken straight to the sink (if you are not in need of keeping it to wash other equipment in).
Not only does this step remove the water, but it also cleans the gravel by removing lot of the waste that has fallen into the substrate.
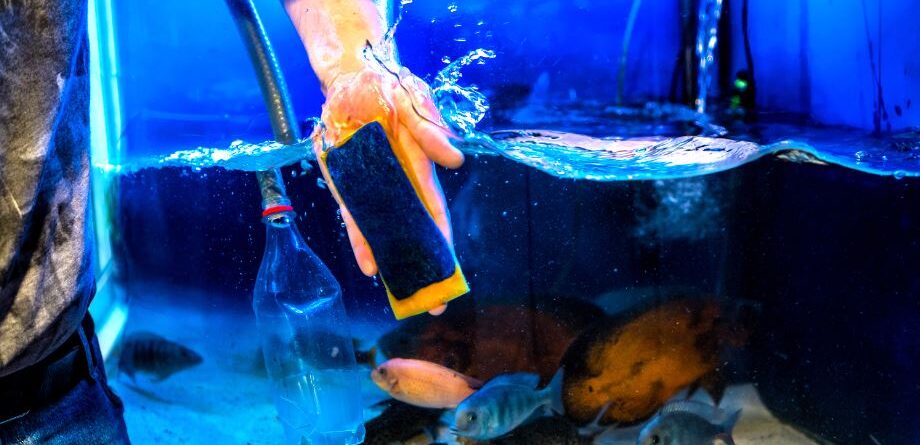
Step Three – Remove Algae
Using a Magnetic Algae Cleaner
Magnetic algae cleaner is the easiest way to clean the glass in your
A magnetic algae cleaner is made up of two magnets with a soft felt covering. You put one magnet inside of the aquarium, and attach the other to the outside.
You then drag the outer magnet around the glass of your aquarium, and the inner magnets follows it and gently remove the vast majority of the algae.
If you own an acrylic aquarium, make sure to buy a cleaner that won’t scratch the surface.
In case you want to clean any of the other larger decorations you’ve already removed (from step two), you are able to do this in the bucket of siphoned out water; using a clean soft-bristled toothbrush.
Never use cleaning products; they can be deadly to your fish.
You might also want to consider buying a clean-up crew of algae eaters, which will clean the algae in the tank by eating it.
Step Four – Filter Cleaning
Depending on the quality and type of filter that you use, you will need to clean and sometimes even change the medium in your water filter.
The Sponge filter is the most common type of filter. If you want to clean this, you should remove it and rinse it out in the bucket of water.
Never run your filter under tap water, because the beneficial bacteria built up in the tank will be removed when it’s necessary for your tank.
Any other filters which behave as a mechanical filter, as a sponge does (filter fiber, ceramic rings, etc.) should also be cleaned and quickly returned to avoid losing the bacteria colonies.
If your filter contains carbon, ammonia absorbers, or, ion-exchange resins it will need weekly replacement because it won’t be able to absorb materials.
You should also rinse the rest of the filter, including the tubing (use a filter brush for this).
Step Five – Water Replacement
Your aquarium now needs to be filled up with water.
The type of water you add depends on whether you have a saltwater tank or freshwater tank
Freshwater Water Preparation
If you have enough time to prepare the water in advance, leave the tap water out for 24 hours before cleaning your tank in order for the chlorine in the water to evaporate.
You’ll need to use a water conditioner to remove any of the heavy metals, toxins and chlorine which make serious harm to fish.
By preparing your water in advance, this allows the water of reaching room temperature too.
Saltwater Water Preparation
You’ll need to be more precise when it comes to water changes in saltwater tanks. You need to observe three parameters – pH, salinity and temperature.
For reef aquariums you’ll need RO/DI water (deionized water and/or reverse osmosis). You can purchase this from your local fish store, or you can get a system which produces RO-DI water. Ideally you should use this water for all the types of saltwater tank.
You should only use tap water in case of having an excellent local supply, and even then, tap water should only be used for fish-only aquariums. If you have to use tap water, make sure to have it tested for TDS (total Dissolved Solids) the reading should be zero, but anything less than 10 is OK.
You will need to dechlorinate the water and then add salt mix . There are different options available, so make sure you pick a quality and reputable brand. The product you choose determines the instructions.
Most salt mixes will need to be put in warm water which is moving. You can do this with a heater and a powerhead.
You should leave the water over night before putting it in the aquarium, so that the salt completely dissolve.
Always make sure that the salinity and the temperature of the water are as similar as possible before you put in back into the aquarium; this prevents sudden changes in your tank.
Check the water parameters in your aquarium after a couple of hours, and also check that the water is not cloudy.
Finally, you can clean the exterior of the tank using an aquarium approved glass cleaned and a cloth.